Setting Your Domain Records #
Step 1. Watch the video above, which explains how to “point” your domain registration records either via the “A-Record method” or the “Cloudflare DNS method”. The video explains which method is best for you.
If you have any existing A-Records, please delete them.
Then create a new A-Record and set it to the IP address:
172.104.85.22
OR
The Cloudflare DNS name server addresses for your site should be set to:
surina.ns.cloudflare.com
joaquin.ns.cloudflare.com
This documentation will be updated if those settings change in the future.
Step 2. Notify BabelTEQ that your domain registration records have been changed. You can send an email to info@babelteq[dot]com. Usually we will want to wait a few hours after the change to make sure the new IP address has had time to “propagate” across the world wide web.
NOTE: Please advice what DOMAIN NAME you are using e.g. myteachersite.com in your email.
Otherwise it will be impossible to complete the setup procedure.
Installing Facebook Pixel and Verifying Your Domain #
If you are planning to run Facebook Ad campaigns you will NEED to send that traffic to your custom domain. There are a few additional steps required.
Step 3. Once you receive notification back from BabelTEQ that your website is now “live” on your domain name, you can ask BabelTEQ to add your Google Tag Manager codes. There will be two pieces of code which look like this:
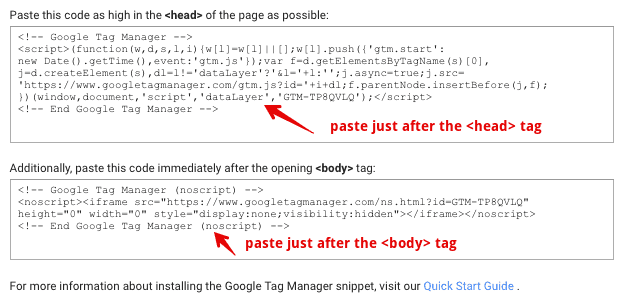
Copy these codes into the form below. You will receive an email confirmation from BabelTEQ once they have been added.
Google Tag Manager Codes #
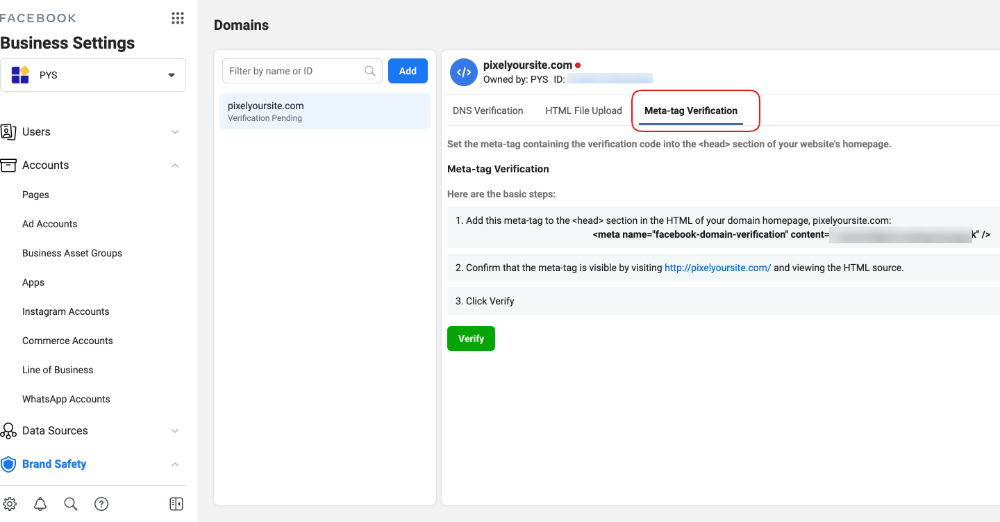
Step 4. At the same time as sending your Google Tag Manager codes (or soon after) you will need to “verify” your domain with Facebook. The easiest way to do that is to get the Facebook verification code and ask BabelTEQ to add it for you. You can find your HTML Facebook verification meta-tag in your Facebook Business Manager account under Business Settings / Brand Safety. There will be one piece of code which looks like this:
Copy the HTML code into the form below. You will receive an email confirmation from BabelTEQ once it has been added.
Facebook Verification HTML Code #
After BabelTEQ has added the <meta name=”facebook-domain-verification” … > tag, you will receive an email confirmation. You can then click the green “Verify” button on your Facebook Business Account page to complete the verification procedure.
Step 5. If you are not sure if your Google Tags or your Facebook Pixel are working, you can check by adding either of these two Google Chrome extensions (they are free).
Google Tag Manager Assistant
Facebook Pixel Helper
Step 6. Make sure all your Facebook Ads are pointing to the correct landing page address.
That’s it!